Unveiling the Secrets: How to Cook Kokuho Rice in a Rice Cooker
Written By James Morgan
Welcome to the world of rice enthusiasts! If you've ever wondered how to cook Kokuho rice in a rice cooker, you're in the right place. This comprehensive guide will not only introduce you to the rich history and unique characteristics of Kokuho rice but will also provide you with detailed steps on achieving perfect results every time you cook.
:max_bytes(150000):strip_icc()/make-sticky-rice-in-rice-cooker-3217199-hero-02-90beca8ebad94497a1d5cc941d52fa1c.jpg)
What is Kokuho Rice?
Kokuho rice, a product cherished by many, originates from California. Known for its medium-grain and slightly sticky texture, it holds a special place in the hearts of rice lovers. Personified by its remarkable flavor and versatility, Kokuho rice is suitable for various dishes ranging from sushi to simple steamed rice. Its origins date back to the mid-20th century when Koda Farms, a family-owned business, introduced this variety that has since become a staple in many kitchens.
:max_bytes(150000):strip_icc()/make-sticky-rice-in-rice-cooker-3217199-hero-02-90beca8ebad94497a1d5cc941d52fa1c.jpg)
The Importance of a Quality Rice Cooker
Before we dive into the nitty-gritty of how to cook Kokuho rice in a rice cooker, it's crucial to understand why investing in a quality rice cooker matters. A good rice cooker ensures evenly cooked grains, maintains the right moisture level, and simplifies the whole process. When choosing a rice cooker, consider factors like capacity, ease of use, and additional features such as the keep warm function. Zojirushi and Tiger brands are often recommended for their reliability and performance.
Ingredients Youll Need
- 1 cup Kokuho rice
- 1 1/4 cups water
- Salt (optional)

Tools Required

Step-by-Step Guide on How to Cook Kokuho Rice in a Rice Cooker
Step 1: Measure and Rinse the Rice
Using a measuring cup, ensure you have the correct amount of Kokuho rice. For this recipe, we'll use one cup of rice. Rinse the rice thoroughly under cold water to remove excess starch. This step is vital for achieving that fluffy and non-sticky texture.
Step 2: Add Rice and Water to the Cooker
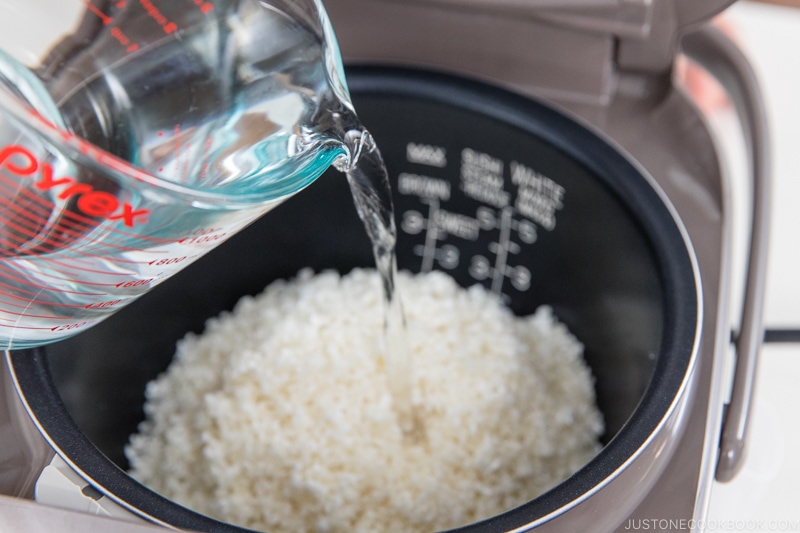
After rinsing, place the rice in your rice cooker. Add 1 1/4 cups of water. The water-to-rice ratio is crucial; too much water will make the rice mushy, while too little water can leave it undercooked.
Step 3: Set the Rice Cooker
Plug in your rice cooker and select the appropriate setting. Most modern rice cookers have specific settings for different types of rice. For Kokuho rice, a regular or white rice setting will suffice. Once selected, simply press 'start' and let the cooker do its magic.
Step 4: Let the Rice Rest
Once the cooker signals that it's done, let the rice sit for about 10 minutes. This resting period allows any remaining moisture to be absorbed, ensuring perfectly cooked grains.
Step 5: Fluff and Serve
Using a rice paddle or a fork, gently fluff the rice to separate the grains. Serve immediately or keep it warm until you're ready to enjoy your meal.
Cooking Tips and Variations
Experimenting with different techniques can yield varied textures and flavors. For a slightly nutty taste, try toasting the rice in a dry pan before rinsing. You can also infuse the cooking water with herbs or spices for added aroma. If you prefer a sweeter note, substitute some of the water with coconut milk.
Storage and Reheating
Store any leftover rice in an airtight container and refrigerate for up to five days. To reheat, sprinkle a little water over the rice and microwave on low heat, or steam it on the stove to retain its original moisture and texture.
Cleaning Up
After enjoying your delicious meal, it's essential to clean your rice cooker. Most rice cooker bowls are non-stick, so use non-abrasive sponges and mild soap. Regular maintenance ensures your cooker performs well for years.
As an Amazon Associate, I earn from qualifying purchases.
Conclusion
Understanding how to cook Kokuho rice in a rice cooker opens the door to endless culinary possibilities. Whether you're preparing a simple bowl of steamed rice or using it as a base for extravagant dishes, mastering this cooking technique is a valuable skill. The quality of Kokuho rice combined with the convenience of a rice cooker ensures a satisfying dining experience every time.


