How to Cook Soup Beans in a Pressure Cooker: A Comprehensive Guide
Written By James MorganCooking soup beans can be a delightful experience, especially when you know how to cook soup beans in a pressure cooker. This method not only saves time but also locks in flavors and nutrients. In this article, we will cover the step-by-step process of preparing delicious soup beans using a pressure cooker, and we will delve into various tips and tricks to ensure your dish is nothing short of perfect.

The Ultimate Guide to Perfect Soup Beans
Sauting aromatics, soaking beans overnight, adjusting cooking times there's an art to cooking soup beans that every aspiring chef should know. When you learn how to cook soup beans in a pressure cooker, you not only streamline the process but also enhance the overall taste and texture of your beans. Let's dive into the details and explore each step comprehensively.
Why Use a Pressure Cooker?
Pressure cookers are a game-changer in the kitchen. They drastically reduce cooking times while preserving the nutritional value of your ingredients. This is especially significant when making soup beans, as the pressure cooker helps soften the beans quickly and evenly. Here are a few reasons why you should consider a pressure cooker:
- Time-Efficiency: Traditional methods of cooking beans can take several hours. A pressure cooker cuts this time down significantly, allowing you to enjoy your meal sooner.
- Nutrient Retention: The sealed environment of a pressure cooker ensures that vitamins and minerals are retained within the food, making your soup beans healthier.
- Flavor Enhancement: The pressurized environment helps infuse flavors deep into the beans, resulting in tastier dishes.
Ingredients You Will Need
Before we begin, let's gather all the necessary ingredients. Below is a list of items you'll need to prepare soup beans in a pressure cooker:
- 1 pound of dried beans (navy, pinto, or black beans)
- 4 cups of water or broth
- 1 large onion, chopped
- 2 cloves of garlic, minced
- 1 teaspoon of salt (optional)
- 1 teaspoon of pepper
- 1 bay leaf
- 2 tablespoons of olive oil

Preparing Your Ingredients
How to cook soup beans in a pressure cooker starts with proper preparation. Begin by sorting through your beans to remove debris or damaged beans. After that, rinse your beans thoroughly under cold water. Although soaking beans isn't strictly necessary when using a pressure cooker, doing so can reduce the cooking time and improve texture.
Soaking Your Beans
Soaking beans before cooking can make them easier to digest and improve their flavor. To soak your beans, place them in a large bowl and cover them with water. Let them sit for at least 8 hours or overnight. Drain and rinse the soaked beans before adding them to your pressure cooker.
Chopping Vegetables
Next, prepare your vegetables. Chop the onion finely using a sharp knife and cutting board. Mince the garlic cloves to release their full flavor. These vegetables aren't just seasonings; they serve as the flavor foundation for your soup beans.

Step-by-Step Cooking Instructions
1. Sauting the Vegetables
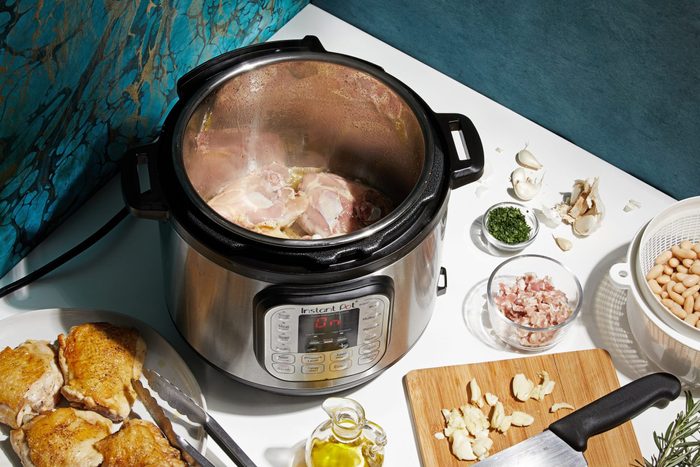
Set your pressure cooker to the saut function. Add the olive oil and allow it to heat up before adding the chopped onions. Cook the onions for about 5 minutes until they become translucent. Add the minced garlic and cook for an additional 2 minutes. The aroma of sauted onions and garlic is a delightful beginning to your dish.
2. Adding the Beans and Liquid
Once your vegetables are sauted, it's time to add the beans. Place the rinsed beans into the pressure cooker. Pour in the water or broth, ensuring the beans are fully submerged. The ratio of liquid to beans can affect the final texture of your soup, so aim to keep the right balance.
3. Seasoning
Add the salt (if using), pepper, and bay leaf to the pressure cooker. You can also incorporate other spices or herbs based on your preference. The choice of seasonings can vary widely depending on whether you're going for a basic soup or a more complex flavor profile.
4. Cooking Under Pressure
Seal the pressure cooker lid and set it to high pressure. Cook the beans for about 25 to 30 minutes. The exact time can vary depending on the type of beans you're using, so consult your pressure cooker manual for recommendations. Once the cooking time is complete, allow the pressure to release naturally. This ensures that the beans finish cooking evenly and become tender all the way through.
5. Natural Pressure Release
Let the pressure drop naturally for about 10 to 15 minutes. This step is crucial as it secures the beans' texture and prevents them from becoming mushy or overcooked. Afterward, you can carefully release any remaining pressure and open the lid.

Serving and Enjoying Your Soup Beans
Once your beans are cooked to perfection, it's time to serve. You can enjoy your soup beans as is, or you can add additional garnishes like fresh herbs, a squeeze of lemon juice, or even a sprinkle of cheese. The versatility of soup beans means they can be enjoyed as a main dish or a side component.
Storing and Reheating Leftovers
Scoop the remaining beans into an airtight container once your meal is done. They can be stored in the refrigerator for up to 5 days. To reheat, simply place them in a small saucepan on the stove over medium heat until warmed through. You can add a splash of water or broth to prevent the beans from drying out.
Tips and Tricks for Perfect Soup Beans
Here are a few tips to ensure you get the most out of cooking soup beans in a pressure cooker:
- Soaking Beans: Although not mandatory, soaking beans can reduce cooking time and enhance texture.
- Pressure Settings: Different beans may require different pressure settings. Always check your pressure cooker manual.
- Seasonings: Don't be afraid to experiment with seasonings. Bay leaves, thyme, cumin, and paprika can add unique flavors to your soup beans.
- Broth vs. Water: Using broth instead of water can elevate the flavor of your dish.
Conclusion
Knowing how to cook soup beans in a pressure cooker can open up a world of culinary possibilities. This method is not only time-efficient but also enhances the flavor and nutritional value of your beans. With the right ingredients and a trusty pressure cooker, you can whip up a hearty, satisfying meal that will appeal to your friends and family.
Additional Resources
For further reading and tools needed for this recipe, consider the following resources:
Happy cooking!
As an Amazon Associate, I earn from qualifying purchases.
As an Amazon Associate, I earn from qualifying purchases.


