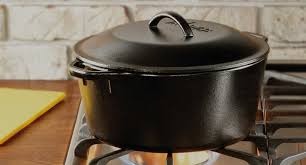
Big, Amazing Peasant Bread Recipe: Dutch Oven Perfection
Written By James Morgan
Peasant bread has a unique charm. The smell of warm, fresh bread baking in a dutch oven brings an aura of comfort and delight to your home. If you're yearning for a loaf that's rustic yet incredibly easy to make, this is the recipe for you. Our amazing peasant bread recipe using a Dutch oven will change your perspective on homemade bread.
Many people feel daunted by the idea of baking bread, but this peasant bread recipe using a Dutch oven eliminates all the complexities. It's a straightforward process that ensures a delicious, crusty loaf every time. Whether you're a beginner or an experienced baker, you'll be thrilled with the results.

Why Use a Dutch Oven?
A Dutch oven is the secret weapon in achieving the perfect loaf of peasant bread. But why?
The Dutch oven's heavy construction ensures even heat distribution and retains steam, which is critical in creating bread with a soft, airy inside and a crisp, golden crust. Moreover, it allows you to replicate the environment of a professional steam-injected oven right in your kitchen.

Ingredients Needed for the Perfect Peasant Bread
Before diving into the process, let's gather all the required ingredients. Our peasant bread recipe calls for simple, easy-to-find items:
- Flour (All-purpose or bread flour)
- Water
- Active Dry Yeast
- Salt
- A little bit of sugar (optional)
- Olive oil or butter (for greasing)
Choosing the Right Flour
All-purpose flour is sufficient for this recipe, but for a more robust bread, bread flour will give it extra chewiness due to its higher gluten content. Whichever you choose, ensure it's fresh for the best results.

Step-by-Step Instructions for Peasant Bread
Step 1: Activating the Yeast
Start by mixing warm water and sugar. Sprinkle the active dry yeast on top and let it sit for about 5-10 minutes. This step ensures the yeast is alive and active, which is crucial for the bread to rise.
Step 2: Mixing and Kneading the Dough
In a large bowl, combine the flour and salt. Gradually add the yeast mixture and stir until a dough forms. Turn the dough onto a floured surface and knead for about 10 minutes until it becomes smooth and elastic. Don't worry; this is a no-knead recipe, so a bit of stickiness is fine.
Step 3: First Rise
Place the dough into a well-oiled bowl, cover it with a damp cloth, and let it rise in a warm place for 1-2 hours or until it has doubled in size.
Step 4: Shaping the Dough
After the first rise, punch down the dough to release air. Shape it into a round loaf, cover it with a damp cloth, and allow it to rest while you preheat the oven.
Step 5: Preparing the Dutch Oven
Preheat your oven to 450F (232C) with the Dutch oven inside. Once preheated, carefully remove the hot Dutch oven, grease it lightly, and place your dough inside. Cover with the lid.
Step 6: Baking the Bread
Bake the bread covered for 30 minutes. Then, remove the lid and bake for an additional 10-20 minutes or until the crust is golden brown and the internal temperature reaches 200F (93C).

Cooling and Storing Your Peasant Bread
Once baked, carefully remove the bread from the Dutch oven and place it on a wire rack to cool. This cooling step is vital as it enhances the bread's texture.
Storage Tips
Store your peasant bread in a cool, dry place. It's best enjoyed fresh within the first few days but can be frozen for up to three months. When ready to eat, thaw at room temperature or reheat in the oven for a few minutes to revive its crustiness.
FAQs About Peasant Bread Recipe Dutch Oven
1. Can I Use Instant Yeast Instead of Active Dry Yeast?
Yes, you can use instant yeast. If you do, you can skip the activation step and mix it directly with the flour and salt.
2. Can I Add Other Ingredients to This Recipe?
Absolutely! You can add herbs, seeds, cheese, or even dried fruit to this bread for a unique twist.
3. What If I Don't Have a Dutch Oven?
While a Dutch oven gives the best results, you can use a heavy-duty pot with a tight-fitting lid or even a casserole dish as an alternative.
Want to dive deeper into more recipes and tips? Check out this link for more detailed guidance on baking bread.
As an Amazon Associate, I earn from qualifying purchases.
Also, if you're curious about other useful cooking utensils, take a moment to read about the cast iron skillet vs. enamel coated, or how to clean a copper skillet.
If youre looking for additional recipes and cooking tips, check out the delicious recipes using KC Butt Spice, or learn about the Brooklyn Biltong bag size.
As an Amazon Associate, I earn from qualifying purchases.


