The Ultimate Camping Dutch Oven Recipe for Outdoor Enthusiasts
Written By James Morgan
Planning a camping trip and want to wow your friends and family with a mouth-watering meal cooked in the great outdoors? Look no further! This guide will introduce you to the **Camping Dutch Oven Recipe**, a delightful dish that brings warmth and comfort under the stars. Get ready for an extraordinary outdoor cooking experience as we explore the captivating world of Dutch oven recipes.

Why Choose a Dutch Oven for Camping?
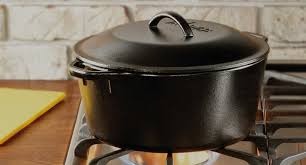
The charm of a camping Dutch oven recipe lies in the Dutch oven's versatility and durability. Made from cast iron, a Dutch oven conducts heat evenly, perfect for slow cooking, baking, frying, and even boiling. Its heavy lid ensures that heat and moisture stay inside, making your meals delightfully moist and tender. In a camping setting, the Dutch oven can be used over an open fire, with charcoal, or on a stovetop, offering multiple cooking options.
Essential Gear for Your Dutch Oven Adventure
Before diving into the camping Dutch oven recipe, its essential to equip yourself with the right gear. Heres what you need:
Additional Items for a Seamless Cooking Experience
Having a durable Dutch oven is just the beginning. You will also need a reliable Cookware Cleaner to maintain your equipment and a Cutting Board Oil to keep your tools in top shape.

Ingredients for the Ultimate Camping Dutch Oven Recipe
- 2 lbs of beef chuck, cut into chunks
- 1 large onion, chopped
- 4 cloves of garlic, minced
- 3 large carrots, peeled and sliced
- 4 potatoes, cubed
- 2 cups of beef broth
- 1 can of diced tomatoes
- 2 tablespoons of Worcestershire sauce
- 1 tablespoon of soy sauce
- 1 teaspoon of thyme
- Salt and pepper to taste
- 2 tablespoons of vegetable oil
Step-by-Step Cooking Instructions
Now, lets get cooking!
Step 1: Preparing the Ingredients
On your sturdy cutting board, use your sharp knife to chop the onions, mince the garlic, and cut the beef chuck, carrots, and potatoes. Ensuring all your ingredients are prepped and ready will make the cooking process smooth and enjoyable.
Step 2: Heating the Dutch Oven
Place your Dutch oven over the campfire or on a portable stove, and add the vegetable oil. Allow the oil to heat up until it shimmers, indicating its ready for the meat.
Step 3: Browning the Beef
Add the beef chunks to the hot oil and sear them until they are brown on all sides. This step is crucial, as it helps lock in the flavors, ensuring a delicious, savory stew.
Step 4: Adding Aromatics
Once the beef is browned, add the chopped onions and minced garlic to the pot. Stir frequently to prevent burning and cook until the onions are translucent. This step allows the flavors to meld together, creating a tantalizing aroma.
Step 5: Building the Stew
Incorporate the sliced carrots, cubed potatoes, beef broth, diced tomatoes, Worcestershire sauce, soy sauce, thyme, salt, and pepper. Give everything a good stir to combine all the ingredients. Let the mixture come to a boil.
Step 6: Slow Cooking
Reduce the heat and place the lid on your Dutch oven. Allow the stew to simmer for about 2 to 3 hours, stirring occasionally. The key here is low and slow – the longer the simmering time, the more tender the beef and vegetables will become.
Step 7: Serving Your Masterpiece
Once the stew has thickened and the meat is fall-apart tender, its time to serve. Scoop generous portions into bowls, and enjoy the wondrous flavors of your camping Dutch oven recipe under the vast sky.
This meal is not only hearty but also steeped in the tradition of outdoor cooking, making it a hit at any campsite.
Tips and Tricks for the Perfect Dutch Oven Cooking
Creating the ultimate camping Dutch oven recipe doesnt have to be daunting. With some practice and the right tips, youll be crafting culinary masterpieces at every campsite. Here are some additional tips to ensure your success:
Use Quality Ingredients
The freshness and quality of your ingredients profoundly impact the flavor. Opt for fresh vegetables, and if possible, grass-fed beef to elevate your dish.
Managing Heat
Controlling the heat is vital when using a Dutch oven. Too much heat can burn the food, while too little will leave you with undercooked meals. Start with a moderate fire, and adjust as necessary.
Pre-season Your Dutch Oven
Before the initial use, ensure your Dutch oven is well-seasoned. This process creates a non-stick surface and enhances the flavor of your dishes. Here's a helpful guide on cleaning a Dutch oven.
Experiment and Customize
The beauty of recipes is their flexibility. Feel free to adjust the seasonings, add your favorite vegetables, or try different cuts of meat. Making the recipe your own adds a personal touch.
Hungry for more outdoor cooking tips and recipes? Discover the joys of making Dutch Oven Chicken, dive into a hearty Guinness Stew, or try your hand at baking artisan bread while enjoying the great outdoors. Check out more at Grilling4All.com where we delve into all things grilling and outdoor cooking.
As an Amazon Associate, I earn from qualifying purchases.


