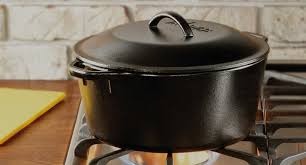
How to Master the Perfect Dutch Oven Brownies Recipe for Every Occasion
Written By James Morgan
If you're someone with a penchant for delightful desserts, then Dutch oven brownies should be your go-to treat. These rich, fudgy brownies are bound to bring a smile to anyone's face at any event. Whether it's a family gathering, a picnic, or a cozy night in, these brownies are sure to showcase your baking skills.

Why Choose a Dutch Oven for Baking Brownies?
Baking brownies in a Dutch oven isn't just about convenience; its about achieving the perfect flavor and texture. The even heat distribution in a Dutch oven ensures a consistent bake, giving your brownies that gooey center every chocolate lover dreams of. Furthermore, a Dutch oven is versatileyou can use it on the stove, in the oven, or even over a campfire. This adaptability makes it a fantastic tool for any dessert enthusiast.
Ingredients You'll Need
- 2 cups of granulated sugar
- 1 cup of unsweetened cocoa powder
- 1 cup of melted butter
- 4 large eggs
- 1 1/2 cups of all-purpose flour
- 1 teaspoon of vanilla extract
- 1/2 teaspoon of salt
- 1 teaspoon of baking powder
- 1 cup of chocolate chips (optional)
- 1/2 cup of chopped nuts (optional)
Equipment Needed
Your cooking experience is as good as your tools. Here's a list of essential equipment:

Step-by-Step Instructions for the Perfect Dutch Oven Brownies
Step 1: Preparing Your Ingredients
Before you start baking, it's crucial to prepare your ingredients. Gather everything from the ingredient list. Use your knife and cutting board to chop any nuts or chocolate chips if you opted for these add-ins. Pre-measure your sugar, cocoa powder, flour, and salt to streamline the process. Melt your butter and let it cool slightly before mixing it into the batter.
Step 2: Mixing the Batter
In a large mixing bowl, whisk together the sugar, cocoa powder, and melted butter until smooth. Add the eggs one at a time, making sure to beat well after each addition to get a rich and creamy texture. Then, gently fold in your flour, salt, and baking powder until just combined. Be careful not to overmix, which can make the brownies tough. Add the vanilla extract and optional add-ins like chocolate chips or nuts for an extra flavor boost.
Step 3: Preparing the Dutch Oven
Preheat your Dutch oven to 350F (175C). Grease the interior with butter or non-stick cooking spray. This step is essential to prevent the brownies from sticking to the pan and ensures easy removal after baking.
Step 4: Baking the Brownies
Pour the prepared brownie batter into the greased Dutch oven, spreading it evenly with a spatula. Cover the Dutch oven with its lid and place it in the preheated oven. Bake for about 25-30 minutes, or until a toothpick inserted into the center comes out with a few moist crumbs. For fudgier brownies, slightly under-bake them compared to traditional cake-like brownies.
Step 5: Cooling and Serving
Once baked to perfection, remove the Dutch oven from the oven and let it cool on a wire rack. Allow it to cool completely before cutting to avoid a gooey mess. Use a sharp knife to cut your brownies into squares of your desired size. Serve them with a scoop of vanilla ice cream or a drizzle of caramel sauce for an elevated treat.

Tips and Tricks for the Best Dutch Oven Brownies
Tip 1: Enhancing Flavor
Consider adding a teaspoon of espresso powder to your brownie batter. This ingredient amplifies the chocolate flavor without making your brownies taste like coffee. Using high-quality cocoa powder and chocolate can also elevate the overall taste profile of your brownies.
Tip 2: Achieving the Perfect Texture
One secret to achieving the perfect brownie texture is to avoid over-mixing your batter. Over-mixing can lead to dense, cake-like brownies instead of the desirable fudgy texture. Folding in the dry ingredients just until combined is a crucial step in this process.
Tip 3: Adjusting for Altitude
If you're baking at a high altitude, you might need to adjust your recipe slightly. Higher altitudes can affect how baked goods rise and set. You may need to reduce the amount of baking powder and sugar slightly while increasing liquid ingredients to compensate for moisture loss.

Storing and Freezing Your Dutch Oven Brownies
If you don't plan to eat all the brownies in one sitting, it's essential to know how to store them properly to maintain their freshness. Store your brownies in an airtight container at room temperature for up to 4 days. For longer storage, freeze them. Wrap each brownie individually in plastic wrap, then place them in a freezer-safe bag or container. They can be frozen for up to 3 months. Thaw them at room temperature before serving for the best texture and taste.
Conclusion
Mastering the Dutch oven brownies recipe opens up a world of delicious possibilities. The rich, fudgy texture combined with ease of preparation makes it a go-to dessert for many occasions. The use of a Dutch oven not only simplifies the process but also imparts a unique flavor and texture that's hard to replicate with standard baking pans. So grab your Dutch oven, follow these detailed steps, and enjoy the finest brownies you've ever tasted.
As an Amazon Associate, I earn from qualifying purchases.
Maintaining Your Cookware
After enjoying your delicious dessert, it's essential to take care of your trusty tools. Make sure to clean your Dutch oven properly with a reliable Cookware Cleaner, and give your cutting board some love with a high-quality Cutting Board Oil to keep them in top condition for your next baking adventure. To keep your Dutch oven in optimal condition, check this comprehensive guide on how to clean it properly.
As an Amazon Associate, I earn from qualifying purchases.


